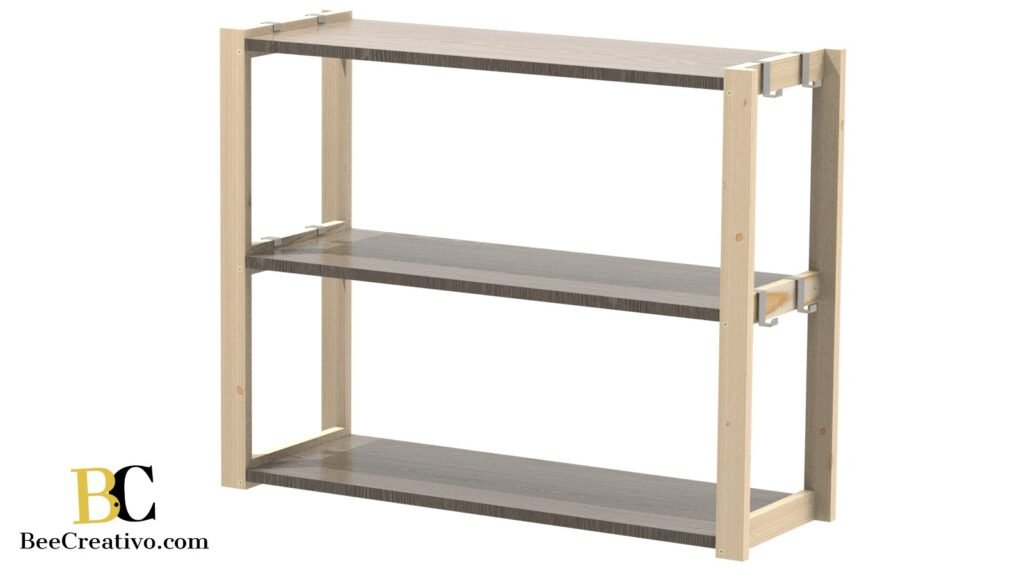
Kitchen is a wondrous place where delicious dishes are made to bring joy in our and our family’s life, and as such it deserves special attention from us. Follow this step by step DIY Kitchen Shelf guide to make your own shelf and unleash your creativity.
We made this wooden shelf to place spice storage jars, baking supplies, fruit baskets and hang kitchen utensils.
With easy access and a brilliant display this makes a good addition to our kitchen.
Materials and Tools Required to DIY Kitchen Shelf
Start with gathering all the Materials and Tools needed and make a list of missing materials or tools which you need to procure.
If a tool is out of budget you can think of an alternative tool to use.
Materials Required
- 2 Spruce timbers 2.4m long, 18mm thick and 44mm wide
- 3 Oak effect furniture boards 2.5m long, 18mm thick and 300mm wide
- 8 Stainless steel hooks
- 12 Wood Dowels Ø6
- 12 Wood Dowels Ø8
- M6 screws
- Wood glue to improve joints rigidity
- Wood finish for a smooth appearance
Depending on your preferences and stock of your nearest DIY store you might decide to use different thicknesses or different wood materials. You can find so many different hook designs to choose from, important is to make sure it fits on your shelf.
Tools Required
- A screw driver for M6 screws
- A Drill machine to drill the holes for screws and dowels
- Ø8 and Ø6 Drill bit
- Drilling Jig to drill the hole straight
- Table saw to cut the timber and boards
- Eye protection goggles
- A face Mask
- Gloves
- A tape measure
While cutting, sanding and drilling holes use goggles, a mask and gloves to avoid inhaling sawdust, protect your eyes and hands from splinters
Step by Step Guide
Step 1 Cutting List
After gathering all the materials and tools reuired to DIY Kitchen Shelf, this is the first step to start making your shelf. For this step you will need the table saw, a tape measure, a pencil, 18x44x2400mm spruce timber and 18x300x2500mm oak effect furniture board.
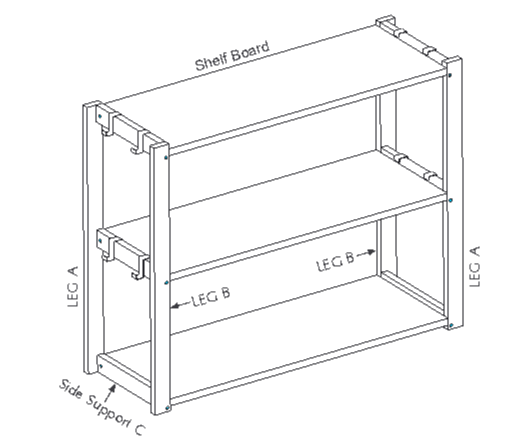
Leg “A” and “B”
Leg A and Leg B are of the same length, holes positions are the only difference between them.
Make a mark from one edge to 700mm of distance on 18x44x2400mm spruce timber and use the table saw to cut. Repeat to Cut 4 pieces 700mm long and mark 2 of them as “A” and the other 2 as “B”.
Side Supports "C"
These are the supports used to hold leg A and leg B together and clamp the stainless steel hooks.
Use what is left of the spruce timber 18x44x2400mm to cut six pieces 264mm long and mark them as “B”.
shelf Boards
Read the tips below to make sure the cutting lines are straight and all boards are of the same length.
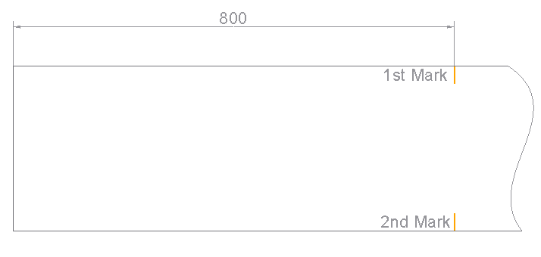
Make a mark from one edge to 800mm of distance on oak effect furniture board and cut the first shelf board. repeat the procedure to cut 3 shelves in total.
Tips: Once you cut the first piece of timber you can use it to mark the cutting lines for the following cuts with same length.
Tips: To cut the shelf board make a mark at each end at the exact distance to cut and then use a ruler or a board to join the marks to create the cutting line. Use the first board to make cutting lines for the other boards with same length.

Step 2 Drill Holes
This is the second step of DIY Kitchen Shelf guide which consist of making holes into Leg A and B, side supports C and shelf boards.
Leg A
Use the tape measure or a ruler to mark holes positions shown in image below on leb B front view and the side view.
Insert the Ø8 bit into the drill and set the adjustable depth stop to 12mm to ensure the hole does not exceed the desired length. Use the drilling jig to ensure the holes are straight. Drill the first hole Ø8, 12mm deep in position 10mm from one edge and 9mm from the other edge as shown in Leg B front view.
Replace the Ø8 drill bit with Ø4 bit and make the hole at position shown in leg A front view 24mm distant from Ø8 hole. Drill all the way through as shown in section A-A. Use countersink drill bit to make countersink hole to allow the screw head to sit flush. Note that the countersink is on Ø4 hole and it is on the opposite face to front view.
Repeat to make 3 sets of holes (Ø8×12 and Ø4 with countersink) at 328mm of pitch.
On the right side of leg A drill 3 holes Ø8×16, shown in section B-B, with 328mm of pitch. See the position of the first hole in Side View of image below. And from there drill the other 2 holes 328mm distant from each other.
Leg B
Follow the steps in previous section to make the holes on leg B. The only difference between Leg A and Leg B is that the holes, Ø8×12 and Ø4 with countersink, on Leg A front view are 9mm distant from the right edge and these holes on Leg B front view are 9mm distant from the left edge. The holes Ø8×16 in section B-B, for leg A they are on right side face and for leg B they are on left side face.

Side Support C
We need to make 4 holes on each side support C, 2 holes on the front face and 2 on the left and right side faces.
Use a Ø4 bit to drill 2 holes Ø4 on positions shown in image below on front face and Use countersink drill bit to make countersink hole to allow the screw head to sit flush.
For holes on left and right side faces use a Ø8 drill bit to drill holes 20mm deep.

Shelf Boards
Drill 2 holes Ø8 – 16 deep on each side of the shelf using a Ø8 drill bit. Make sure to drill the holes straight to avoid breaking out.

Step 3 Apply Finishes
there are so many choices when it comes to surface finishes. You can choose to apply a stain or a paint and varnish to seal and protect wood from dirt and liquids.
For our shelf we chose to keep the natural wood look and therefore we applied only a clear wood varnish to the legs and side supports to give them a protection and enhance the wood. Before applying the varnish make sure the surfaces are clean and smooth. If required, sand the surfaces.
Step 4 Assemble Parts Together
it’s time to assemble the parts together. We will go through the steps below to assemble the Shelves, legs and side supports together to get our kitchen shelf ready to be placed in our kitchen.

- Use a hammer to fix Ø8 – 30mm long dowels into 6 Ø8 holes, 3 on front face and 3 on side face, on Leg A and 6 on Leg B.
- clean the area and apply wood glue on surfaces which will be joined together. After assembling, give 20-30 minutes to the glue to set and fit the parts tightly.
- Assemble leg A, Side Supports C and Leg B securing them together by Ø6 dowels and using M4x40 countersink screws.
- Add shelf boards and secure them together by Ø8 dowels and M4x40 countersink screws.
- Assemble Stainless Steel hooks in place and your shelf is ready.


